Blaze Your Trail: A Guide to Building and Starting a Great Campfire (Even in the Rain)
Learn the art of campfire building, from wood selection to starting a dependable blaze. We'll even share essential tips for conquering campfire construction in the rain! Read on and become a fire-starting pro.
There's something almost primal about gathering around a crackling campfire after a long day of adventure. The smell of wood smoke, the warm glow of the flames, the shared stories and laughter – it's a quintessential camping experience that never gets old. But for many, especially beginners, building a dependable and warm campfire can seem like a daunting task. In this guide, we'll walk you through everything you need to know about starting a great campfire, from preparation and gathering fuel to different techniques and even troubleshooting in challenging conditions like rain. Let's ignite your campfire skills!
Preparation: The Foundation of a Great Campfire
Before you even think about lighting a match, it's essential to prepare properly. Here's what you need to do:
Check Local Regulations: Always, and we mean always, check fire regulations in your camping area. There might be fire bans, specific fire ring usage requirements, or restrictions on wood collection. Safety first!
Choose the Right Location: If your campsite has a designated fire pit or ring, use it. This is usually the safest option as it contains the fire and keeps it off the ground. If not, choose a spot on bare earth, away from overhanging branches, low vegetation, and tents. Ensure there is no risk of the fire spreading.
Clear the Area: Clear a 10-foot radius around your fire pit of all flammable materials, including dry leaves, sticks, grass, and pine needles. This acts as a buffer zone to prevent accidental fire spread.
Gather Your Fuel: You'll need three types of wood to build and sustain a good fire:
Tinder: This is fine, dry, flammable material that catches fire quickly. Examples include dry leaves, dried grass, pine needles, small twigs, shredded birch bark, cattail fluff, or even commercial fire starters.
Kindling: These are small sticks and twigs, ranging from pencil-thin to about an inch in diameter. They catch fire from the tinder and help to ignite the larger logs. Ensure they are dry and seasoned.
Fuel Wood: This is the larger wood that will sustain the fire for hours. Choose well-seasoned hardwood (like oak, maple, birch, or cherry) for a longer-lasting, hotter fire. Softwood (like pine, spruce, or cedar) ignites faster but burns out more quickly.
Building and Starting Your Campfire: The Techniques
Now that you're prepared, let's explore a few popular techniques for building your campfire structure:
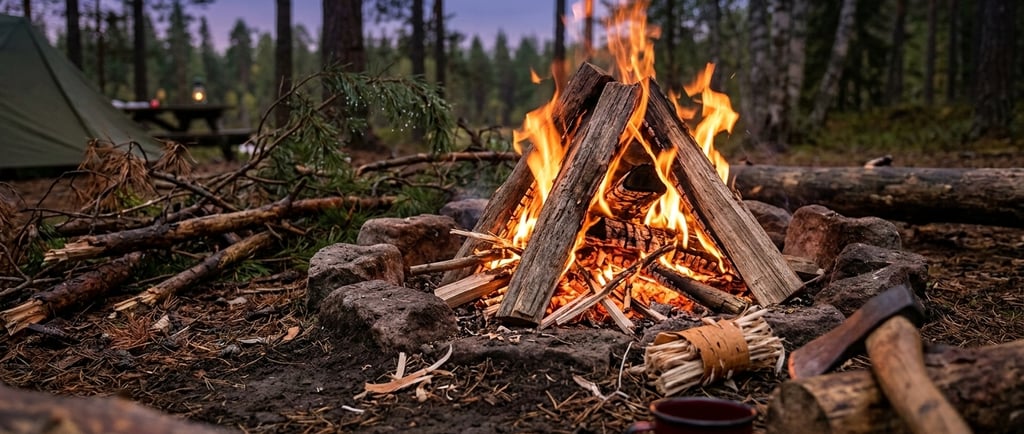
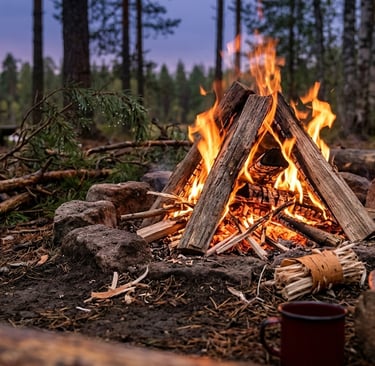
1. The Teepee Method:
Structure: Arrange a small bundle of tinder in the center of your fire pit. Lean several pieces of kindling against the tinder bundle, forming a teepee structure. Leave a small opening on one side to light the tinder.
Lighting: Light the tinder from the opening. The flames from the tinder will rise and ignite the kindling above.
Adding Fuel Wood: As the kindling catches fire and starts to burn well, carefully add larger pieces of kindling, leaning them against the existing structure. Once you have a strong, hot fire, slowly introduce larger fuel wood logs. Keep adding them gradually as the existing logs burn down.
2. The Log Cabin Method:
Structure: Place two larger logs parallel to each other in the fire pit, leaving a small gap between them. Lay two slightly smaller logs perpendicularly on top of the first two logs, forming a square. Continue alternating directions, building up the "cabin walls" with smaller and smaller wood as you go up. Place tinder and kindling inside the "cabin" structure.
Lighting: Light the tinder in the center of the structure. The chimney effect created by the cabin design helps to draw air through the fire, promoting a strong burn.
Adding Fuel Wood: As the structure burns, the upper logs will gradually collapse into the center, feeding the fire. Add larger logs onto the top or into the collapsing structure as needed.
3. The Lean-To Method:
Structure: Place a large fuel wood log (or a thick rock) as the "backbone" or anchor for your lean-to. Place a bundle of tinder against the backbone. Lean pieces of kindling against the backbone, directly over the tinder.
Lighting: Light the tinder. The flames from the tinder will rise and ignite the kindling leaning against the larger log.
Adding Fuel Wood: As the kindling burns well, gradually add larger and larger pieces of kindling, leaning them against the backbone. Once a strong fire is established, you can carefully introduce fuel wood logs, leaning them against the backbone or the established fire.
Tips for Starting a Campfire in the Rain
Let's face it, nature doesn't always cooperate. If you find yourself needing a campfire in the rain, here's how to persevere:
Be Super Prepared: Double down on your preparation. Gather even more dry tinder and kindling than usual. Consider bringing your own seasoned firewood if local regulations permit, as wood found at the campsite might be damp.
Find Dry Materials: Search for dry fuel in protected areas – under large logs, dense tree canopies, or in small crevices. Don't be afraid to shave the wet outer bark off a log to get to the dry wood underneath for tinder and kindling.
Use a Fire Starter: This is where commercial fire starters truly shine! They are designed to burn hot and consistently, even in damp conditions. Waterproof matches or a windproof lighter are also essential.
Build a Shelter: If possible, try to build a small shelter over your fire pit using a tarp, a poncho, or large branches to shield it from the rain. Just be careful not to place it so low that it catches fire!
Start Small and Be Patient: Don't get discouraged if it takes multiple attempts. Use a generous amount of tinder and focus on getting a strong fire going with small kindling before attempting to add larger logs. Use techniques like the Teepee method that concentrate heat effectively.
Protect Your Flame: When lighting your tinder, shield the flame from the wind and rain with your hands or body. Once the tinder is lit, carefully protect the developing fire structure until it catches.
Maintaining Your Campfire:
Once your campfire is burning well, here are some tips for maintaining it:
Add Fuel Wood Regularly: Don't wait until the fire is almost out to add more wood. Add a new log or two as the existing logs burn down, and the heat begins to diminish.
Aerate the Fire: If your fire seems sluggish or smokey, it might be lacking oxygen. Gently poke the fire with a long stick to create air gaps and rearrange the logs to promote airflow.
Don't Overload the Fire: Adding too much wood at once can smother the fire. It's better to add wood gradually.
Keep an Eye on It: Never leave a campfire unattended. Even a small gust of wind can spark a larger fire.
Extinguishing Your Campfire:
When it's time to put out your campfire, ensure it is completely extinguished. This is critical for preventing wildfires:
Let it Burn Down: Allow the wood to burn down as much as possible, ideally to ash.
Drown it with Water: Slowly pour water over the fire, dousing all the embers and coals. Be careful to avoid sudden bursts of steam.
Stir the Ashes: Use a shovel or a stick to stir the ashes and embers while continuing to add water. Ensure every ember is cooled.
Check for Heat: Carefully place your hand near the ashes (without touching them) to feel for any remaining heat. If you feel heat, add more water and stir again. A completely extinguished fire should be cool to the touch.
Scatter the Ashes: Once completely cool, scatter the ashes away from the fire ring, spreading them out to help them decompose.
Mastering the art of campfire building takes a bit of practice and preparation, but the rewards are well worth the effort. Now that you're armed with these techniques and tips, you're ready to create lasting campfire memories, come rain or shine. So, grab your fuel wood, your tinder, and your matches, and let the flickering flames guide you on your next adventure! Happy Camping!
As an Amazon Associate I earn from qualifying purchases.
© 2026. All rights reserved.
Gear Up. Head Out. Hike On.