Winter Hiking 201: Identifying Avalanche Terrain
A more advanced post for winter enthusiasts. Discuss how to recognize "red flag" conditions, the importance of slope angles (typically 30° to 45° for slides), and the necessity of carrying a beacon, probe, and shovel.
Winter transforms the mountains into a stunning white cathedral, but it also introduces a dynamic objective hazard: the avalanche. If you’ve mastered the basics of winter layering and gear, your next step is developing "mountain sense."
An avalanche doesn’t require a massive peak to be deadly; even a small slope can bury a hiker. Here is how to identify and avoid avalanche terrain before you find yourself in the middle of it.
Avalanche safety is a complex science, but for hikers, it boils down to understanding the three factors that create a slide.
1. Slope Angle: The "Danger Zone"
Most avalanches occur on slopes between 30° and 45°.
Under 30°: Generally too flat for the snow to slide.
Over 45°: Often so steep that snow sloughs off in small amounts before a large slab can form.
The Trap: Even if you are on flat ground, you might be in a runout zone—the area at the bottom of a steep slope where an avalanche would land.
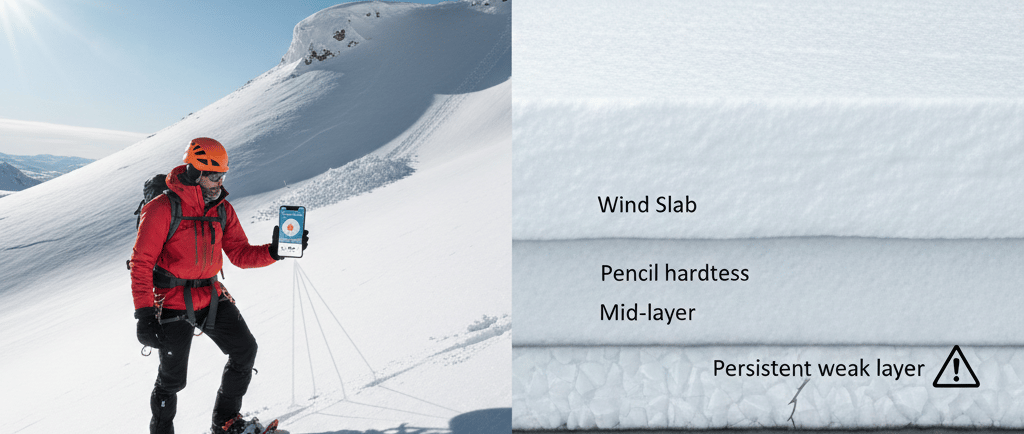
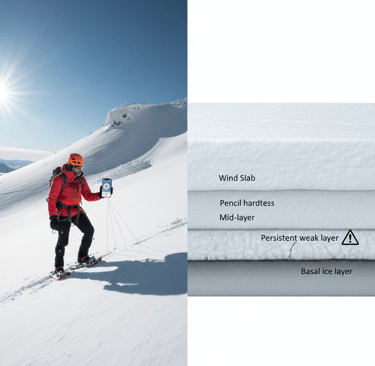
2. The Snowpack: Layers of History
Think of the snowpack like a mille-feuille pastry. Some layers are strong, while others are "persistent weak layers" (like ball bearings).
Red Flag: If you hear a "whumpf" sound or see cracks shooting out from your boots, the snowpack is collapsing. These are immediate signs to turn around and find flatter ground.
3. Recent Weather: The Great Trigger
The most dangerous time to hike is during or immediately after a storm.
Wind: Wind is the "architect" of avalanches. It moves snow from one side of a ridge to another, creating "wind slabs" that are incredibly unstable.
Rapid Warming: A sudden spike in temperature (or rain on snow) adds weight and lubricates the layers, making a slide more likely.
Tools for the Modern Winter Hiker
In 2026, we have better data than ever, but you have to use it.
The Forecast: Before you leave the house, check your local avalanche center (e.g., NWAC in the Cascades or CAIC in Colorado). They provide a daily danger rating from "Low" to "Extreme."
Inclinometer: You can download apps for your phone that use the camera to measure the angle of a slope. If it's $34^\circ$, you are in the heart of the danger zone.
The Safety Trinity: If you are traveling in avalanche terrain, you must carry—and know how to use—a beacon, probe, and shovel.
How to Stay Safe: "The Human Factor"
Often, it’s not the snow that fails; it’s our judgment. We get "summit fever" or follow existing tracks, assuming they are safe.
Never assume a trail is safe just because there are footprints in the snow. People walk into dangerous terrain every day. Be your own navigator.
As an Amazon Associate I earn from qualifying purchases.
© 2026. All rights reserved.
Gear Up. Head Out. Hike On.